
Git has powerful commands that can save you time, effort, and even revert mistakes :D It's a great tool for all developers, but some commands are easily forgotten or unknown for junior developers.
Here is a comprehensive recap of the Git commands you might need in your everyday developer life. I’ve added complementary links if you want to dig deeper or need specific support for your problem.
First Steps: Create & Synchronize
Create, Clone & Synchronize repository
Create a repository and push to Github
Create a new repository using git commands
Clone a repository
Synchronize/Update your local branch
Create & Change Branches
Create a new branch
Switch to a new branch
Switch to the master/main branch
While Coding: Inspect, Add & Commit
Browse & Inspect Your Projects/Branches
History of your branch
Differences between your current branch and the master branch
Differences between two branches
Show files that have been worked on in your branch
Add
Add your files
Commits
Add a commit message
Revert a commit
Remove a commit message but keep its content: Squash
Git rebase
Ready to Push!
Add, Commit & Push!
Add the files
Commit and commit message
Push your work to the origin branch
8 Best Cheatsheets For React Developers
Shortcuts
Create, Clone & Synchronize A Repository
Create a repository and push to Github
https://github.com/new —> Create a new repository on GitHub
Copy the SSH KEY available on Github once the repo is created (What is a SSH Key?)
On your terminal, type the commands:
git clone {SSH URL}
Great! Now you can work from your terminal and add/commit/push your work!
Create a new repository from the git commands
git init {repository name}
Make sure to create it on the path you want! You can also create it this way:
git init /home/code/personal-projects/{repository name}
git remote add origin {SSH URL}
git fetch
git push origin master
Clone a repository
You need to clone a repository from Github
From your Terminal:
git clone{SSH URL}
OR
git clone{HTTPS URL}
Where can I find the SSH Url and the HTTPS Url?
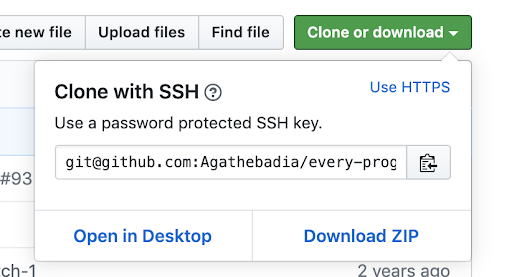
The difference between SSH Key and HTTPS URL Y'all know Git, but what about Dolt? A SQL-based database that works just like Git.
Synchronize/Update your local branch
git pull
→ Update your local branch with what your colleagues pushed to Github since your last git pull
Best practices: Run git pull first thing everyday! Right before starting a new branch or continuing on one. It will update your branch with the latest push(es) your colleagues have been working on.
Create & Change branch
Create a new branch and change branch
Create a new branch on your master branch and switch to it:
git checkout -branch {your-branch}
—> Checkout allows you to switch from one branch to another
Switch to a branch:
git checkout {your-branch}
Switch to the master/main branch:
git checkout master
New command in town!
git switch {your-branch}
→ Alternative for checkout - More about git switch
Best practices: Remember to close and delete the branch once your pull request is merged (on GitHub). No worries, a branch can always be restored if needed ;)
Next time you want to go back to an open branch from your terminal (using tab because you can’t remember the exact name of it), you will avoid overwhelming lines of suggestions.
Browse & Inspect your projects/branches
History of your branch
git log
→ See each commit of the current branch with the name of the author, the date the commit message and its commit key.
See the differences between your current branch and your index
git diff
See the difference between two branches
git diff {branch1}...{branch2}
Show the files that have been worked on in your branch
git status
Best practices: Use both git status and git diff before git add/git commit/git push, to double check if you edited a file/line by mistake - it’s way easier than checking the files in the codebase!
Add
Add the files you are working on
git add {folder or files or .}
→ means everything in the repository - be careful when you use it! It’s safer to add the folders you worked on.
Git add is the first step to save, as a snapshot of your current work. It usually follows with git commit and git push (cf ‘Ready to push!’ section). More about Saving changes.
Best practices: When git add-ing, you can use git status before, to see what files have been changed. So you are sure to snapshot the exact files you want ;)
e.g.
git status
## your-branch
app/styles/component/profile/profile.scss
→ The file that has been updated is from the app folder,so you can be more specific when you save and write:
git add app
If you want to add the specific file, hit tab and add the path you need to reach it
git add app/styles/component/profile/profile.scss
Commit
Add a commit with a message to your branch
git commit -m "your message"
Revert a commit (made an error you want to revert)
git checkout {your branch}
git reset {commitkey}
→ preserves local changes
OR
git reset --hard {commit key}
—> (changes back to the specific commit)
git log
—> Check if your latest history log is the commit you wanted to go back to
git push --force-with-lease origin {your branch}
Done!
More about: Revert a commit, Git reset, Force with lease
Remove a commit but keep its content - use commit, but meld into previous commit: Squash
git checkout {your-branch}
gitrebase -i master
On the git rebase todo, replace {pick} with {squash} or {s} - it will use the commit, but meld it into the previous commit.
Enter until you are back into your terminal.
Then:
git push --force-with-lease origin {your-branch}
You’re done! Your commits’ history should be updated :)
Git rebase is quite powerful, you can also use commands such as:
# Commands:
# p, pick <commit> = use commit
# r, reword <commit> = use commit, but edit the commit message
# e, edit <commit> = use commit, but stop for amending
# s, squash <commit> = use commit, but meld into previous commit
# f, fixup <commit> = like "squash", but discard this commit's log message
# x, exec <command> = run command (the rest of the line) using shell
# b, break = stop here (continue rebase later with 'git rebase --continue')
# d, drop <commit> = remove commit
# l, label <label> = label current HEAD with a name
# t, reset <label> = reset HEAD to a label
# m, merge [-C <commit> | -c <commit>] <label> [# <oneline>]
If you want interactive git rebase, check out this article!
More about: Git rebase
Watch GitHub CEO Thomas Dohmke using... LEGOS
READY TO PUSH!
Add, commit and push
Did you inspect your code and files with git status AND/OR git diff? If not, I recommend you to go back to ‘Browse & Inspect’!
Add your files
git add {folder OR file OR .}
→ . means everything in the repository, be careful when you use it! It’s safer to add the folders you worked on
Commit and add a commit message
git commit -m "your message"
→ How to write a good commit message?
You can also combine git add and commit in one line:
git add {folder} && git commit -m "your message"
Push your branch to the origin branch!
git push origin {your-branch}
Git commands are not that difficult to grasp, but we tend to forget the syntax, the meaning, or the word we need to do a command. I hope this article will help you in the first steps of your developer career!
Interested in more git commands? Great! I’ve regrouped additional readings to complete your git skills :muscle:
Git commands - Listed by categories
Complete List of Git Commands - THE complete Guide!
Visual Git Cheat Sheet - If you are more of a visual learner
Think Like (a) Git - For advanced reading
SHORTCUTS
-branch → -b
git checkout -b {new-branch}
checkout → co
git co master
status → st
git st
-force → -f
git push -f origin {your-branch}
Git rebase commands:
pick → p
reword → r
squash → s
fixup → f
exec → x
break → b
drop → d
label → l
reset → t
merge → m


